Training your own AI image model might seem difficult at first, but FluxGym makes the process much easier for beginners. With its intuitive interface and simplified workflow, you can train a custom FLUX LoRA model without relying heavily on command-line tools or advanced machine learning knowledge. Whether you want to create a unique art style, a consistent AI character, or a personalized image generation model, FluxGym provides the tools needed to get started efficiently.
In this guide, you’ll learn how to use FluxGym to train your first FLUX LoRA model, from preparing a high-quality dataset and configuring the right training settings to monitoring progress and testing your finished LoRA. By following these steps, you’ll be able to build a reliable model and gain confidence in your AI training journey.
Read More: Is FluxGym Free, Safe, and Worth Using in 2026?
What Is a FLUX LoRA Model?
A FLUX LoRA model is a lightweight file that teaches a FLUX base model how to generate a specific style, character, object, or visual concept. Instead of training an entirely new AI model from scratch, LoRA training only focuses on the information needed to represent your custom subject. This approach significantly reduces training time and hardware requirements while still producing impressive results.
Many creators use FLUX LoRA models to generate consistent characters, replicate artistic styles, create branded product images, or develop unique visual identities. Because LoRA files are much smaller than full AI models, they are also easier to store, share, and reuse across compatible workflows.
Why Choose FluxGym for LoRA Training?
FluxGym was created to simplify the FLUX training process. Traditional AI training often involves lengthy terminal commands, manual configuration files, and multiple software dependencies. FluxGym replaces much of that complexity with an intuitive graphical interface, making it much more accessible for beginners.
Another advantage of FluxGym is that it organizes the training workflow into clear steps. You can import your dataset, configure training options, monitor progress, and export your finished LoRA without constantly switching between different applications. This streamlined experience allows you to focus on creating better training data instead of troubleshooting technical issues.
Prepare Your Dataset Before Training
The quality of your dataset has the biggest influence on the quality of your LoRA model. Even the most powerful training settings cannot compensate for poor or inconsistent images. Before opening FluxGym, spend time collecting images that clearly represent the subject you want the model to learn.
Try to include images from different angles, lighting conditions, and poses while keeping the overall subject consistent. If you’re training a character, include facial expressions, close-up portraits, and full-body images. If you’re training an art style or product, ensure the images accurately reflect the visual characteristics you want the AI to reproduce.
A well-organized dataset also makes the training process smoother. Store all images in a dedicated folder and remove duplicates or blurry files. Clean, high-resolution images generally produce more reliable and detailed LoRA models.
Install and Open FluxGym
Before training begins, make sure FluxGym is properly installed on your computer along with all required dependencies. After launching the application, you’ll typically see options to create a new project, import a dataset, select a base FLUX model, and adjust training parameters.
Creating a new project helps keep your files organized. Give your project a meaningful name so it’s easier to identify later, especially if you plan to train multiple LoRA models for different subjects or styles.
Import Your Training Images
Once your project is created, import your dataset into FluxGym. The software will scan your image folder and prepare the files for training. This is a good time to verify that every image has been loaded correctly and that there are no missing or corrupted files.
If you’re using captions with your images, make sure they are correctly associated with each file. Accurate captions help the AI understand what appears in each image, improving the model’s ability to generate consistent and relevant results.
Select the Correct FLUX Base Model
Choosing the correct base model is one of the most important decisions during training. Your LoRA should always be trained using the same FLUX model that you plan to use for image generation later. This ensures compatibility and helps maintain image quality.
If you’re unsure which base model to choose, start with the version recommended by the FluxGym documentation or community. As you gain experience, you can experiment with different FLUX models to see which one works best for your projects.
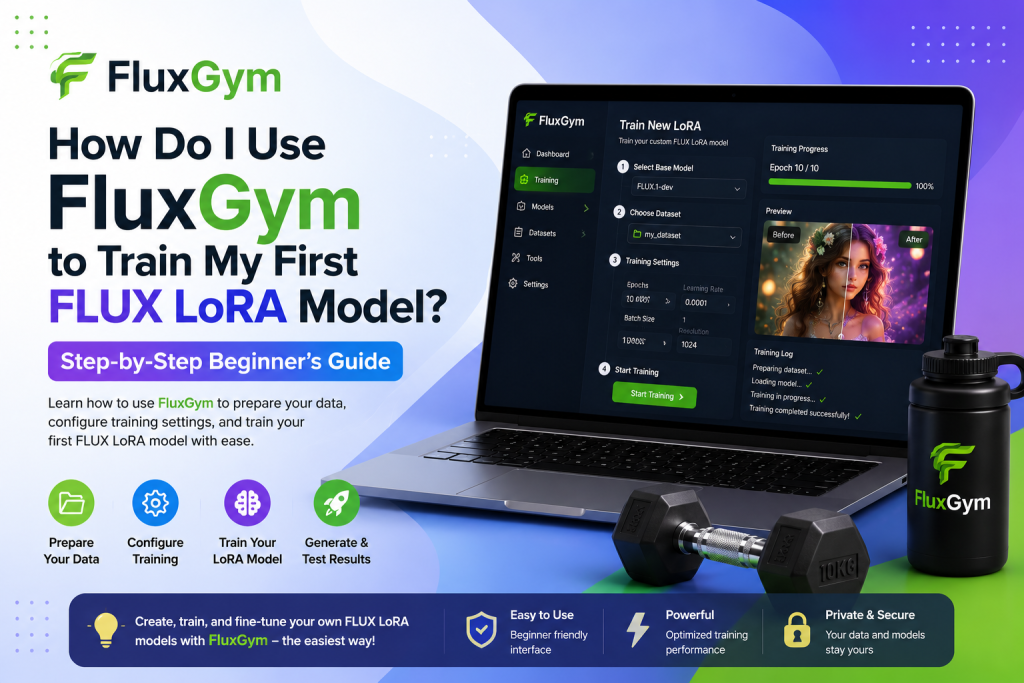
Configure the Training Settings
FluxGym offers several training settings that influence how your LoRA learns from the dataset. Beginners don’t need to change every option immediately. In many cases, the default settings provide an excellent starting point for a first training session.
The most important settings include the learning rate, batch size, number of epochs, and image resolution. The learning rate controls how quickly the model adapts, while the batch size determines how many images are processed at once. Epochs define how many times the dataset is reviewed during training, and image resolution affects both quality and hardware requirements.
It’s better to start with balanced settings than to aggressively increase every value. After completing your first successful training session, you can gradually experiment with different configurations to improve future results.
Start Your First Training Session
After reviewing your settings, begin the training process. FluxGym will start processing your images while displaying useful information such as training progress, current epoch, estimated completion time, and preview images.
Training duration depends on your hardware, dataset size, and chosen settings. A smaller dataset may finish relatively quickly, while larger and more detailed projects require additional time. During training, avoid interrupting the process unless you notice a serious problem, as stopping too early may produce an incomplete LoRA model.
Monitor the Training Progress
One of FluxGym’s most helpful features is the ability to preview generated samples while the model is training. These previews provide valuable insight into how well the LoRA is learning your chosen concept.
Pay attention to image consistency, color accuracy, and overall quality. If later previews begin to look worse than earlier ones, the model may be overfitting. In future projects, you can adjust the number of epochs or refine your dataset to achieve a better balance between learning and flexibility.
Test Your Finished LoRA Model
After training is complete, FluxGym exports your LoRA model, allowing you to use it with compatible FLUX image generation workflows. Testing is an essential part of the process because it helps you understand how well the model performs across different prompts.
Experiment with a variety of prompt styles rather than using only one example. Small changes in wording, LoRA strength, or generation settings can significantly influence the final images. This experimentation will help you discover the strengths of your model and identify areas for improvement in future training sessions.
Tips for Better Training Results
Although FluxGym simplifies LoRA training, the quality of your results still depends on thoughtful preparation. Focus on creating a clean dataset instead of collecting as many images as possible. High-quality images with consistent subjects almost always produce better results than large datasets filled with duplicates or low-resolution files.
Keep your projects organized by saving each LoRA with clear version names and maintaining backup copies of important datasets. As you complete more training sessions, you’ll gain a better understanding of how different settings affect image quality, making it easier to refine your workflow over time.
Best practices include:
- Use clear, high-resolution images.
- Keep your dataset focused on one subject or style.
- Start with the default FluxGym settings.
- Monitor preview images during training.
- Test your LoRA with different prompts after training.
Common Mistakes to Avoid
Many beginners expect perfect results from their first training session, but creating a high-quality LoRA often requires experimentation. Using poor-quality images, mixing unrelated subjects, or selecting inappropriate training settings can all reduce the effectiveness of your model.
Another common mistake is changing too many settings at once. If something goes wrong, it becomes difficult to determine which adjustment caused the problem. Making small, gradual changes between training sessions allows you to learn more effectively and consistently improve your results.
Conclusion
Training your first FLUX LoRA model with FluxGym is an excellent way to explore the world of AI image generation without dealing with unnecessary complexity. Its beginner-friendly interface and streamlined workflow make it easier to prepare a dataset, configure training settings, and create custom LoRA models that match your creative goals. While your first results may not be perfect, each training session helps you better understand how datasets, prompts, and settings affect the final output. With consistent practice and high-quality training images, you can gradually create more accurate and professional LoRA models. Whether you’re designing unique characters, artistic styles, or branded visuals, FluxGym provides a practical and efficient platform to start your FLUX LoRA training journey with confidence.